Friday, December 17, 2010

Tag Swap - December

These are the tags I made for my December Tag Swap partner ManLe, owner of Pineapple Cove.  The task was to make 6 of the same tags but I couldn't decide which one to do, so I did 2 different tags (3 of each).  For the flower tag, I cut, rolled and clear embossed the flowers to give it a nice gloss.  It was a bit time consuming, but the results were worth the effort.  I watched Jennifer McGuire's tutorial and learned how to do this. The other fun element of this tag was stamping on felt.  Haven't done it much but I will use it more often because I love the texture felt gives to any project.  StazOn ink seems to work the best on felt.

The bunny tag was such a delight to create just because this Lawn Fawn stamp is so stinkin' cute!   I also used PTI's ticket die for the "to" and "from" and this die is always fun to work with.

Hope you're enjoying the holidays.  I'm almost done with my shopping and this weekend will be my weekend to bake.  Christmas just wouldn't be Christmas without baking.  LOL!  Should be fun!

Thursday, December 2, 2010

OCS - Holiday


This month's One Card Swap theme is "Holiday" and you could choose to make any kind of holiday card you want.  I decided to go with Christmas and make this for my swap partner Lynn Lau.

I saw this shaker box card idea on Suzanne Dean's blog and had to try it out.  Never attempted a shaker box before but this made me put my fears aside and give it a whirl.  And with Lili of the Valley's "Decorating the Tree" stamp, it was a pure delight to create!  The shaker box window was created with a Magnolia window stamp and the outdoor background is a retired image from Elzybells.  I included Martha Stewart snow glitter and some beads and the window is dressed with a garland and flower boxes made from shamrock green and russet red Flower Soft mixed together.  A tip about Flower Soft:  you can buy some pre-made mixes like the Christmas mix, but if you buy the colors separately and mix them yourself, you can use them later individually.  Had I purchased the Christmas mix, I would be stuck using it only at Christmas.  To create the silhouette of the cat, I stamped a regular image of a cat, cut it out and flipped it over.

Thanks for stopping by and I hope you're having a great start to this holiday season!

Supplies:

  • Stamps:  Magnolia window, Elzybells winter background, Stampin' Up Window Dressing cat, Lili of the Valley Decorating the Tree
  • Copics
  • Flower Soft: Russet Red, Shamrock Green
  • Craft Lounge Sparkly Fluff - Sugar

Monday, November 29, 2010

Lovin' Lawn Fawn

I can't express enough how much I am lovin' my Lawn Fawn stamps sets.  They are the cutest images to work with and they stamp so nicely.  I cased this card from owner Kellie Marie's website and had a blast making it.  Dug out my pinking shears and did a huge "no no" by cutting paper, but I couldn't resist.  Doesn't it just make you smile?!

Supplies:
  • Stamps: Lawn Fawn, Verve Sentiment
  • Punch: EK Success small butterfly


Thursday, November 25, 2010

Happy Thanksgiving!

Happy Turkey Day to you!  I hope you're enjoying the feast and festivities of this Thanksgiving day!

This was my simple Thanksgiving project this year.  When I saw this Sizzix turkey die, I couldn't resist it in all its cuteness!  Then when I saw how someone turned it into a peacock (Michele's idea) I was thrilled to know I could use the die year round.   I used SU's sentiment from Day of Gratitude and distressed the edges a little.  Now that I look at this card two weeks after I made it, I think I should have added some pumpkins next to the peacock.  Oh well, that's what happens when you send your cards out right after you make them.  Sometimes it's beneficial to put your cards down for a little while because then you come back to them with a fresh perspective.

Thanks for stopping by and again, Happy Thanksgiving!

Tuesday, November 16, 2010

Doggone Great Birthday!

American Crafts came out with some cute papers and coordinating stamps and I couldn't resist.  I have a weak spot for cute critters if you couldn't tell by now.  The colors from this cheery DP are some of my favorites and I paired American Crafts with PTI to come up with this little card.

Supplies:

  • Stamps: American Crafts "Fountain," PTI "Fillable Frames #1"
  • DP: American Crafts City Park
  • Dies: PTI Eyelet Lace Border, PTI Fillable Frames #1
  • Rhinestones, Crystal Stickles, Felt

Monday, November 15, 2010

Happy Birthday Jenny


My crafting buddy Jenny or CBFF and she calls me, celebrated her birthday last week.  I took her out for brunch at Kilauea Lodge (yum!) on Sunday and we had fun "girl" time!  We talked and ate and talked and ate!  And we even did a little shopping after that!  Jenny is an incredibly generous and kind friend and I hope she had a great birthday!

I recently discovered Lawn Fawn stamps and have fallen in love with them.  Their cute and whimsical style are so up my alley.  I'm thrilled with how well they stamp and I love their versatility and simplicity. I used the bunny for the card and paired it with PTI's matstack 1 die and coordinating stamp.  I wanted to jazz up the envelope so I used the squirrel, hop marks and "yay" from the same stamp set and tied it together with the card's matching DP.  Creating this was pure joy!

Supplies: 
  • Stamps: Lawn Fawn Critters in the Burbs, Verve Big Wish, PTI Tiny Treats Christmas
  • DP: Bella Blvd.
  • Ribbon, buttons, Stickles, Linen Thread

Wednesday, November 3, 2010

Planes Trains and Automobiles

Today is my son's 2nd birthday and this is the theme for his upcoming little party.  We weren't going to do a party this year since last year's was such a big deal.  But at the last minute we decided to have a small get together with a few kids his age.  I had to come up with a quick and simple invitation and this is what I did.  I printed the party information on white cardstock and adhered it to the back of this panel card.  Simple and fun!

Supplies:

  • Stamps:  TPC Studio Transportation
  • DP: Autumn Leaves Zoom Zoom Zoom
  • Spellbinders: Pinking Circles
  • Punch: 2" Circle
  • White Signo Uni-ball Pen

Thursday, October 28, 2010

It's a Batty Kind of Tag

Different versions of this tag had been swirling around in my head for awhile and after playing with numerous papers and embellishments, this was the final result.  It was my first attempt at sewing on paper and I found that it's definitely addicting.  I love the added element stitching gives to the tag.  I used the wacky and yet so cool DP from My Mind's Eye along with the coordinating stamp set.  I packaged the notepads (from my previous entry) and a chocolate bar in a glassine bag, tied it with a ribbon and added the tag.  I added a small wooden clothes pin as a final touch just for interest.  What fun this was!!

Well my Halloween projects are done and now I can enjoy all the festivities with my son.  Have a wonderful and safe weekend everyone!  Happy Halloween!!

Supplies:

  • DP: My Mind's Eye Blackbird
  • Stamp:  My Mind's Eye
  • Punch: SU Bitty Bat Large
  • Buttons, Ric Rac, Small Clothes Pins, Embroidery Thread

Monday, October 25, 2010

Autumn Notes

My friend Donna made a notepad like this for me and I love it.  I keep it in my handbag and never have to scramble for scratch paper anymore.  I decided to give it a try myself and created something with an autumn theme.  Once I got the design down, I did everything in assembly line fashion.  It was so fun using Imaginisce's coordinating fall papers and I can't wait to start designing some for the Christmas holidays.

I got my notepads from Office Max and had them cut 5" x 8" pads in half.  The downside is half the pads will have a red line running through them.  I also had to cover the top of the notepads because they say Office Max and don't look very pretty.  You can order  2-1/2" x 8" pads from PTI, however they have about half the amount of pages than the ones from Office Max.

Supplies:
Stamps: Verve Accent Notes, JustRite circle border, HA pumpkin, PTI Just the Ticket
DP: Imaginisce
Ticket Die: PTI
Doily Lace Tag: MS
Notepads: Office Max
Lace Ribbon: WalMart and SU
Punch: 1-3/4" Circle
Spellbinders: Scalloped Circle

Friday, October 22, 2010

Tag Swap - October

These are the tags I made for my October Tag Swap partner Linda.  I actually did this as a make n' take ornament for Island Scrapbooking's Anniversary Party last weekend, but thought it would look nice as tag as well.  For the background, I used Spellbinder's new lace circle die and silver mirror cardstock.  Then I punched out a 3" circle from seafoam green cardstock.  I stamped a Hero Arts snowflake on white cardstock using Ranger Distress Stormy Sky ink and punched it out with a 2" circle punch.  To make the fan fold, I used 2 pieces of DP cut to 12" x 1-1/4" and scored every 1/2".  Then I  folded the paper on the score lines like an accordion.  I attached the pieces together with double sided tape so I had a continuous circle.  The hardest part is keeping the center flat and together so I used a hot glue gun because the glue drives fast.  After putting the hot glue on the center of the accordion piece, I adhered the 2" snowflake circle on top.  I put some hot glue in the center of the 3" circle and placed the accordion piece on that.  Then I taped the ribbon to the back of the 3" circle and used double stick tape to adhere it to the silver piece.  I love the way these sort of took on a vintage look!

Wednesday, October 20, 2010

OCS - Halloween

This is the card I made for October's One Card Swap and my partner was Janis.  The theme this month was Halloween and although this card took me a while to make, I had SO much fun doing it.  I made it a simple pop-up card and created a little Halloween scene.  I used two of TGF's new digis and the little mummy from last's year Halloween set (also available in digi this year).  I made my own spooky fence by using the MS fence punch and cutting out parts of it to make it more rickety.  I wanted the background to resemble night, but also wanted the cool Hero Arts tree to stand out.  So I used my distress tool and foam sponge and lightly blended some Dusty Concord on the background.  I didn't have orange rhinestones so I colored some clear ones with my Salmon Red Copic pen.

This is just the beginning of my fall projects so stay tuned for more!

Supplies:
  • Stamps: TGF Hallo Shedevil digi, TGF Hallo Skelleton digi, TGF Spooktacular, HA Frightful, HA Happy Halloween, MME Blackbird Stamps
  • Punches:  MS Fence Edger, SU Scallop Trim Border, Marvy 1-1/2" Circle, MS Grass Edger
  • Spellbinders: Labels Four, Fancy Tag
  • Copics, Spider Confetti


Tuesday, October 12, 2010

Island Scrapbooking Anniversary Sale

If you're in Hilo, be sure to come celebrate Island Scrapbooking's 7th Anniversary on Saturday, October 16 from 10am - 2pm.
It'll be an exciting day with all sorts of fun!  Here are some things you can look forward to:

  • In-store Specials (one day only)
  • 2 Free Make 'n Takes
  • Prize Giveaways
  • Goodie Bags
  • Games
  • Birthday Card Contest (bring a handmade birthday card and be entered to win a prize. Winner seleced by random drawing)
  • New Product Lines Introduced

Tag Swap - Sept. Partner

Kyoko was my Tag Swap partner for Sept. and these are the tags she sent me.  HK in all her Christmas glory.... isn't she cute, cute, cute.  Also love the holly embellishment and the ever so popular Baker's Twine. The tags came with some very generous RAKs and it definitely felt like Christmas....Thank you Kyoko!

Sunday, October 3, 2010

Christmas Tag Swap - September

These are the tags  I made for Kyoko's Christmas Tag Swap and my partner for September was actually the creative and talented Kyoko!  I used SU's new Jolly Bingo Bits stamp set and couldn't resist breaking the rules.  You're supposed to make 3 tags, all the same.  Well, I made 8 tags, all different.  I hope Kyoko didn't mind.

A great way to make your own tags with corner punches is to cut your cardstock to 2-1/4" x 3-1/2".  Then punch the top corners with your corner punch.  It's fun to experiment with different ones.  Use a corner rounder for the bottom corners and punch a small circle at the top for your ribbon.  Pretty simple and fun!

Supplies:

  • Stamps: SU Jolly Bingo Bits, Waltzing Mouse Fancy Phrases
  • Punches: MS Modern Garland Corner, Corner Rounder, 1/8" circle
  • Spellbinders: Scalloped Circle

Saturday, October 2, 2010

Zing and a Flourish

I made this sample for Island Scrapbooking using more Zing embossing powder and Hero Arts' Fabulous Flourish.  I saw this idea on someone's blog and I'm sorry I can't remember which blog it was.  I really love playing with Zing and finally got myself some non-neon colors like red and cricket.  I thought the bottom of the card needed some straight lines to juxtapose the curls of the flourish so I used part of the Hero Arts Ledger Cling and some white ink.

Supplies:

  1. Stamps: Hero Arts Fabulous Flourish, Hero Arts Ledger Cling, Hero Arts Sentiment
  2. Punch: SU Scalloped Oval, SU 1-3/4" x 7/8" Oval
  3. Embossing Powder: Zing Neon Green
  4. Rhinestones, Ribbon

Thursday, September 30, 2010

Hi Friend!

I thought it would be fun to combine some of my stamps and give the images "friends." Here I used cc Designs' Belle and gave her a puppy pal from Create in Me.  Sorry for the quick post but I'll be back with more.

Supplies:

  • Stamps: cc designs Fairy Tales Belle, dog from Create in Me, Sentiment cc designs
  • Punch: EK Success Scroll & Dots
  • Die: PTI Clouds
  • Ribbon: SU Victoria crochet
  • Brad: SU Antique Brad
  • DP: October Afternoon, Bo Bunny

Thursday, September 23, 2010

OCS - Summer

This is my first card for the OCS (One Card Swap) organized by Linda.  My partner this month is 
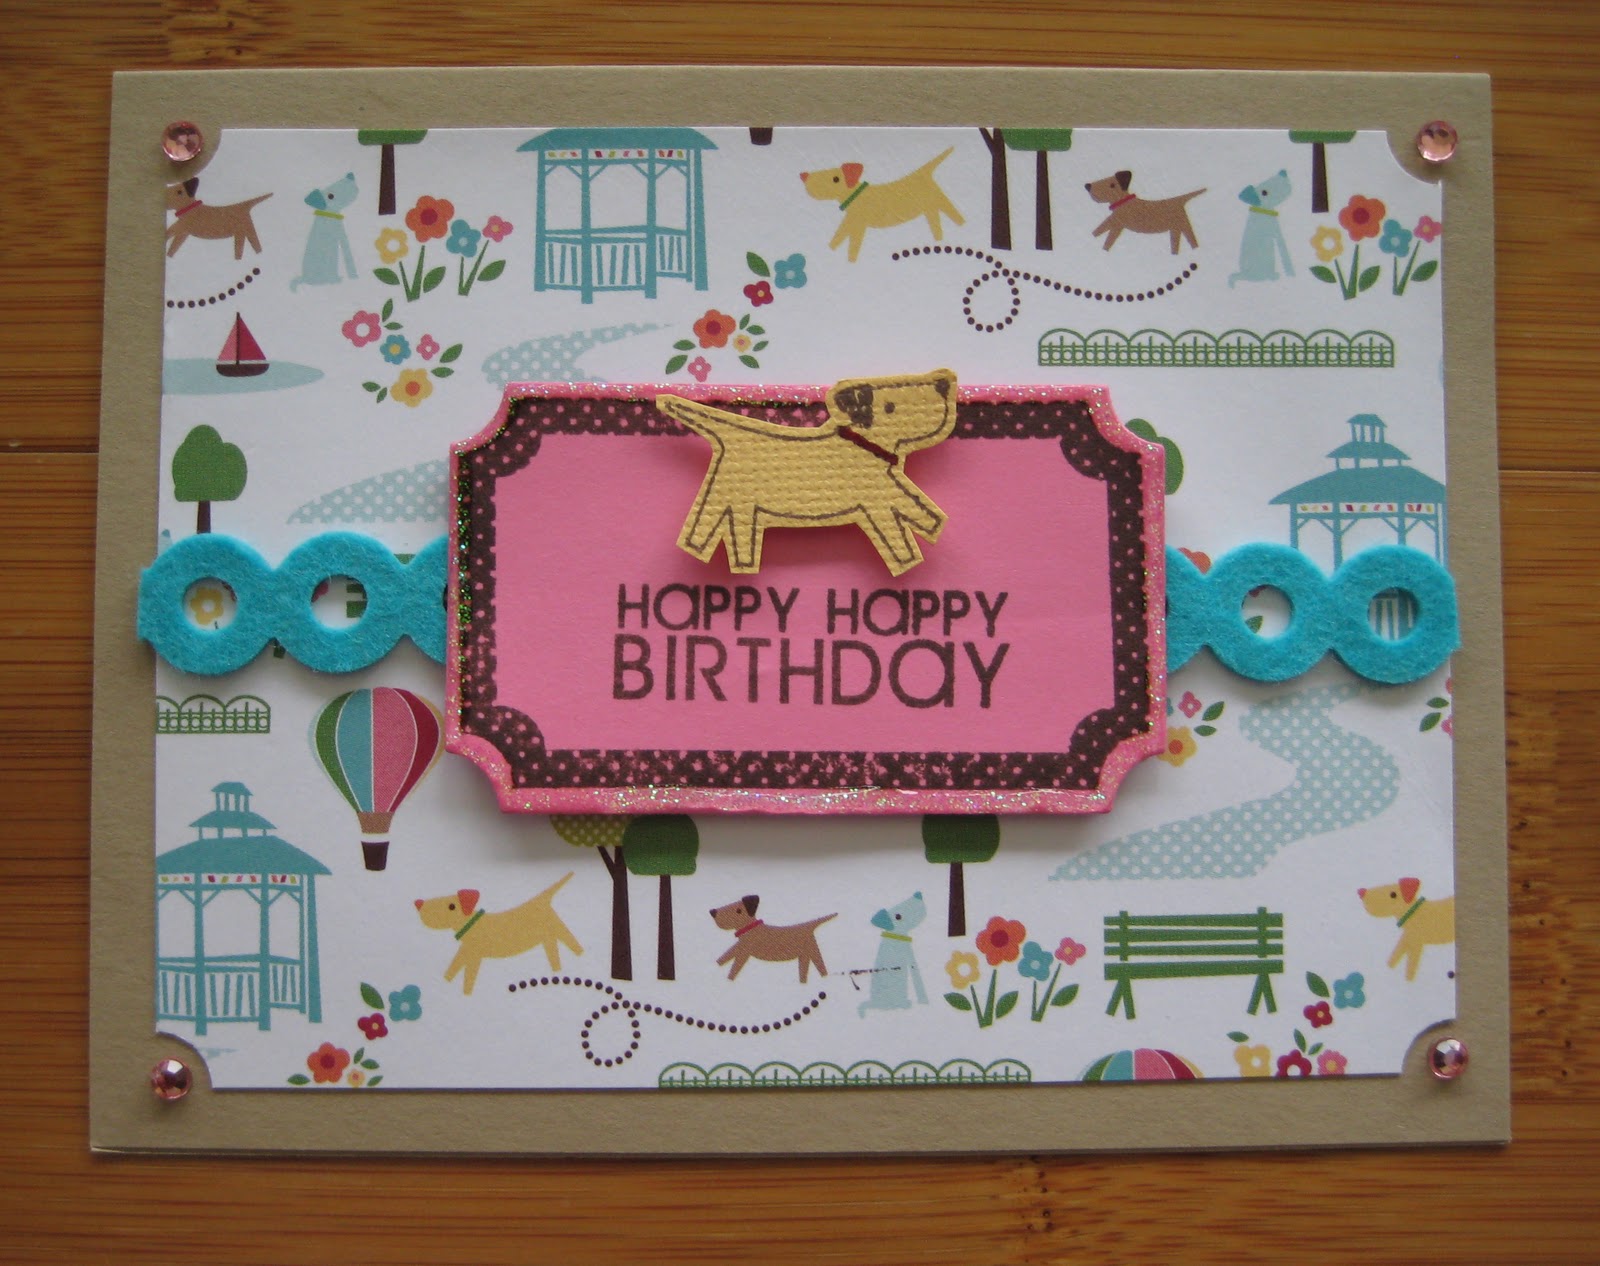
Denise and hopefully she got this in the mail by now.  The theme for this month's card is summer and it was the perfect opportunity to use these Tiddly Inks images.  This boy reminds me of my son who loves the water and uses a yellow star floater.  I used PTI's ticket die and border stamp and I'm thrilled with how the die cuts with perforation just like a real ticket.

There's still time to sign up for October's swap which will be a Halloween themed card.  If you'd like to play along, you can sign up here.

Supplies:
Stamps: Tiddly Inks, PTI Just the Ticket
Spellbinders: Lace Circles, Circles
Punch: Fiskars Boundary Waters
Die: PTI Ticket
DP: Imaginisce
Dew Drops

Sunday, September 19, 2010

4 You!

This is Bugaboo's Desiree and her little Dandelion Designs' feathered friend.  Aren't they cute together?  For some reason the image of this little girl made me think of things like a candy store, bubble gum, cotton candy, etc.  so I reached for some striped paper from one of my favorite paper lines, October Afternoon.  This and a circle sticker from Reminisce, layered with a contrasting brown scalloped circle, set the color palette for the card.  Yummy color combination!  I faux stitched the scalloped circle which I probably enjoy doing because I wish I were better at sewing..lol!  I also used SU's Tiny Tags stamps and punch and hung a "4 You" tag from the ribbon, finished off by a button with linen thread.  

Friday, September 17, 2010

Sympathy with "Elements of Style"

I needed a sympathy card and had to come up with something quick so I reached for my all purpose stamp set from SU called "Elements of Style." I've used these stamps for all occasions and even on notepads. I just love the versatility of this set.   I've also stamped these flowers in many different colors and they look great every time.  The sentiments are from my favorite sympathy set from Amy R called Sympathy Sentiments.

I've been sleep deprived this week so this will be a short post.  Off to catch some much needed zzzz's!  Thanks for stopping by!

Supplies:

  • Stamps: SU Elements of Style, Amy R Sympathy Sentiments
  • Ink: SU Melon Mambo, Versa Color Green Tea, Memento Tuxedo Black

Thursday, September 16, 2010

Holiday Tag Swap #1


Myra was my partner for the Kyoko's August Tag Swap and these are the beautiful tags she sent me.  I love the fun color combination and the DP she used from SU's new Holiday Mini.  The snowflake punch is really nice - hmmm......I might have to get that one.  Thanks Myra!

Tuesday, September 14, 2010

A Sweet Thank You

I made this box and filled it with cookies from Big Island Candies for Donna (3umbrellas.blogspot.com) for kindly answering a comment I made on her blog and sharing a template with me.  I am still a fairly new blogger and I'm always nicely surprised at how generous and willing people are to share their time and creativity.  I appreciate what she did for me.....Thank you again Donna!

Supplies:
  • Sizzix Die: Box #3, Hello Kitty Daisies
  • DP: My Mind's Eye Quite Contrary
  • Crochet Trim: SU Victoria
  • Punch: SU Boho Blossoms
  • Stamp: SU Elements of Style
  • Brads, Prima Leaves

Saturday, September 11, 2010

Lollipop Lollipop.....


......Oh, lolli, lollipop!  This is such a cute idea and I had a chance to try out these See's lollipop holders for a going away party we threw for our friend Donna.  I forgot to take photos of them, so for fun, this is what I did with the left over lollipops.  I finally used some of my real red SU brads (which are almost too cute to use) and  my cousin's wife gave me the animal clothespins from her last trip to Japan.  The leaves were fun to make and I found another way to use the crimper.  If you cut  your leaf, fold it in half (tip to tip) and run it through the crimper at a 45 degree angle you get leaves like this.  When you open up the leaf, you have instant veins!  Pretty cool, huh?!


Thanks for stopping by and have a great weekend!

Supplies:

  • DP: Jillibean Egg Drop Soup, October Afternoon
  • Brads: SU Sending Love Real Red, brushed metal gold
  • Punches: SU Boho Blossoms, 1-1/2" Circle
  • Spellbinders: Scalloped Circle
  • See's Lollipops, Crimper, Animal Clothespins, Button, Baker's Twine

Friday, September 10, 2010

One Card Swap - (Summer Theme)


I received this card from my OCS partner Denise (tinkercrafts.blogspot.com) and it just made my day!  Boy she's on top of things - I haven't even started my card yet.  What a cute card this is - she used TGF's HG Rain Rain digi.  I love the yummy color combination and the cute accent flowers.  And to top things off, she even included some rhinestone RAK for me.  Thank you Denise...I love it!

Thursday, September 9, 2010

ZING!


Michele, owner of Island Scrapbooking let me "play" with some Zing! fluorescent embossing powders and at first I have to admit, I wasn't sure what to do with them.  But once I started experimenting and got my mojo flowing, I realized the many possibilities.  Not only are the colors vibrant, but they also emboss cleanly.  And what I mean by that is the excess powder flicks off nicely.  I hardly had to use my fine brush to clean off extra powder.  I made two slightly different versions of this card and used neon pink for the top card and neon red for the bottom card.

This powder is made by American Crafts and comes in a variety of colors.  If you're here in Hilo, you can find them at Island Scrapbooking. You can also purchase them online from Two Peas in a Bucket 

Supplies:

  • Stamps: Hero Arts Good Thoughts, Hero Arts Thank You (old clear set)
  • Embossing Powder: Zing! Flourescent Neon Pink and Red, Stampendous Midnight Black
  • Stickers: Cosmo Cricket Tiny Type
  • Prima Leaves, Crystal Stickles, Ribbon, Buttons, Velum

Tuesday, September 7, 2010

Happy Days

I hope everyone had a nice Labor Day weekend.  We enjoyed some quiet family time and got some things done around the house.  Nothing too exciting but it was actually nice to relax.  I even took a nap twice - what a luxury!

Anway, I made this card a while ago and I'm finally posting it.  It's another card I had fun making using Ranger Distress Inks.  I also inked up cc Design's Swiss Pixies Gretel - she just makes me smile!

This is going to be short and sweet so thanks for stopping by!  Have a good week!  

Supplies:

  • Stamps: Swiss Pixies Gretel, Sentiment - Your Next Stamp "Happy Days Mermaid"
  • Distress Inks: Dusty Concord, Wild Honey, Peeled Paint
  • Text from a book, prima flowers, pearls, Copics

Thursday, September 2, 2010

Karber Weekly Challenge #3


This week's Karber Challenge is to make a thank you card.  I thought to myself, I have a Karber image I want to play with so why not give it a shot...and here's what I came up with.  I don't usually find myself working with a lot of purples, but it seemed to work best with the DP.  This cutie patootie of an image is called "Smiling Jenny" and she's so adorable.  Just gotta love that face!

There's still time to enter this challenge (deadline 9/5) so come play along with us.

Supplies:

  • Stamp: Karber Smiling Jenny, Hero Arts Sentiment
  • DP: Heidi Grace
  • Punch: Martha Stewart Edge Modern Garland
  • Dies: Spellbinders 
  • Copics, Heart Stickers, White Embossing Powder

Wednesday, September 1, 2010

It's a Dog's Birthday


My mother-in-law and her partner have a cute fur baby named Michelle.  She is their spoiled canine child!  She has the run of the house, the best treats a dog could ask for and gets all sorts of table food, too.  She even gets a birthday celebration on her special day.  And today is her special day.  So in the spirit of celebrating canine birthdays, I made this card for her 16th birthday!  Happy Birthday Michelle!


Supplies:
  • Stamps: Mari & Me, Verve Big Wish
  • Paper: Bella Press Daisy Vines, Doodlebug Crushed Velvet Cardstock
  • Dies: PTI Clouds
  • Punch: MS Grass Edge
  • Copics, Stickers

Monday, August 30, 2010

Hello Kitty Tag Mania


I got my Hello Kitty stamps this weekend and the first thing I thought to do was make gift tags for one of my best friends, Kelli.  I think it's an understatement to say she loves Hello Kitty.  She has EVERYTHING Hello Kitty.  Not only is Kel an HK fanatic, but she's also one of the most generous people I know.  She's always giving gifts, so how perfect would this be?  She can just put a tag on a gift and it's good to go!

I stamped the images on some shimmery Cryogen cardstock and punched it out. I sponged the edges with Distress Ink and layered it with a cut out using Spellbinders Blossom.  I used various DP for the tags that were cut out from Sizzix Tags, Scallop Combo #2.  I also cut out white cardstock using the same Sizzix die and backed each DP (with glue stick) to make the tag sturdy.  Then I stamped the "to" and "from" and added a ribbon.  It's always fun to ink up new stamps!  I made a set of twelve tags and I'll drop them in the mail tomorrow!

Supplies:

  • Stamps: PSA Essentials Hello Kitty, Waltzingmouse Fancy Phrases
  • DP:  My Mind's Eye Sweetie Pie Strawberry, My Mind's Eye Alphabet Soup, Jillibean Soup Ground Ginger, 
  • Dies: Sizzix Tags, Scallop Combo #2, Spellbinders Blossom
  • Punch: 1-1/4" Circle
  • Distress Inks, Ribbon

Sunday, August 29, 2010

Bird in Distress


I'm still having fun experimenting with the Ranger Distress Inks and this is another sample I came up with for the class I taught.  I used a Hero Arts bird image from a Valentine's cling set and found it's versatile for all occasions.  I also used this image in the scrapbook page I posted a few days ago.  Distressing music sheets or pages from a book gives another layer of interest to the card.  Top it off with some linen thread and heart punches and...viola!

Supplies:

  • Stamps: Hero Arts Hugs & Kisses Birds
  • Inks: Distress Stormy Sky, Peeled Paing, Wild Honey, Vintage Photo
  • Punches: SU Heart to Heart, EK Success Small Heart
  • Copics, Linen Thread